
When you type the phrase “recover formatted sd card” into Google, you get 844,000 results. That’s an awful lot of results for something so specific. Apparently, many people often manage to format their SD cards by accident and are desperate to restore what was once on them.
Unfortunately, there’s no modern operating system that gives its users the option to quickly and easily recover formatted SD cards and other storage devices. That’s because formatting is different compared to hitting the delete key on your keyboard, which sends the selected files or folders to the Recycle Bin or Trash.
When deleting some files, the OS moves them from one place (the SD card) to another (the digital junk pile). However, when you format an SD card, your computer or camera or smartphone marks all storage space as empty. This allows other apps and devices to write anywhere in it.
Thus, they can write over the storage area your files used to occupy. That’s the last thing you’d want to happen if you were hoping to recover them.
Is It Possible to Recover Deleted Files from SD Card?
Once overwritten, there’s no way how to recover a formatted SD card’s contents. What you need to do, instead, is download a data recovery software solution capable of restoring data from a formatted SD card.
Currently, there are dozens if not hundreds of SD card data recovery programs available for Windows and Mac OS X. Some of them will cost you an arm and a leg while others are free to download. Many handle only a few file formats, but the best support hundreds. There are data recovery solutions so complicated even IT professionals would struggle to use them, and alternatives so simple you can recover your files in a few clicks — you get the idea.
FAM!! I DELETED SOME FILES BY ACCIDENT ON MY MEMORY CARD!! LITERALLY 15MINS WORTH OF FOOTAGE! I TRIED MANY RECOVER PROGRAMS ALLLLLL NIGHT! PROBABLY SPEND $300 ON SCAM ONES! FINALLY GOT ONE! BIG TIP FOR ANY YOUTUBERS WHO NEED THIS IN THE FUTURE! USE DISK DRILL!
— Cash ✌🏾HYPE (@CashNastyGaming) June 8, 2020
How Can an SD Card Become Formatted?
There are many ways a card can end up formatted. Although not always, unfortunately, in most cases, the cause is user error. Some of the usual reasons your SD card can show up as formatted are:
- Absent-mindedly formatting the wrong SD card.
- Formatting the SD card with a file format that’s incompatible with the rest of your devices.
- Abruptly pulling out the SD card or powering off the device where it’s in active use. Interrupting a write process can lead to file system corruption, which in turn can make your SD card appear formatted.
- A virus or other malicious software could format or corrupt your SD card.
Physically damaged SD cards might appear empty, formatted, or not show up at all on some (or all of your) devices.
How to Recover Data from a Formatted SD Card on Windows
We’ll explore 3 methods you can use to easily recover missing data from a formatted SD card on Windows.
Method 1: Recover Data from a Formatted SD Card using Software
Our experience tells us that Disk Drill SD Card Recovery is the best blend of usability and functionality there is. Built using state-of-the-art user experience and user interface design principles and guidelines, the latest version of Disk Drill by CleverFiles stands out with its signature one-click recovery method and wide range of extra features.

Steps to Recover Deleted Files from a Formatted SD Card
- Insert the formatted SD card into your computer. Disk Drill will automatically detect it, allowing you to start the recovery process.
- Scan your SD card with Disk Drill. Because Disk Drill employs several sophisticated data recovery algorithms to restore over 200 different file types, the recovery process can take a few minutes. Needless to say, it’s worth the short wait.
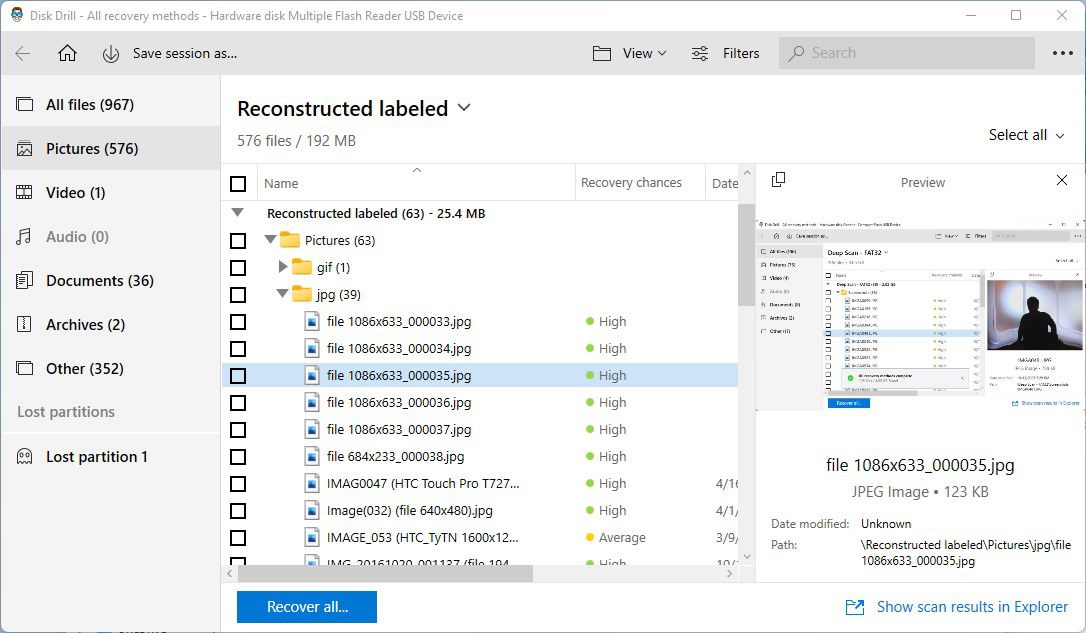
- Preview your files. When Disk Drill locates lost content on your formatted SD card, it will give you the option to either restore everything or prioritize the files you need the most. If you choose the manual route, you’ll then be able to preview and select the files you want to recover.
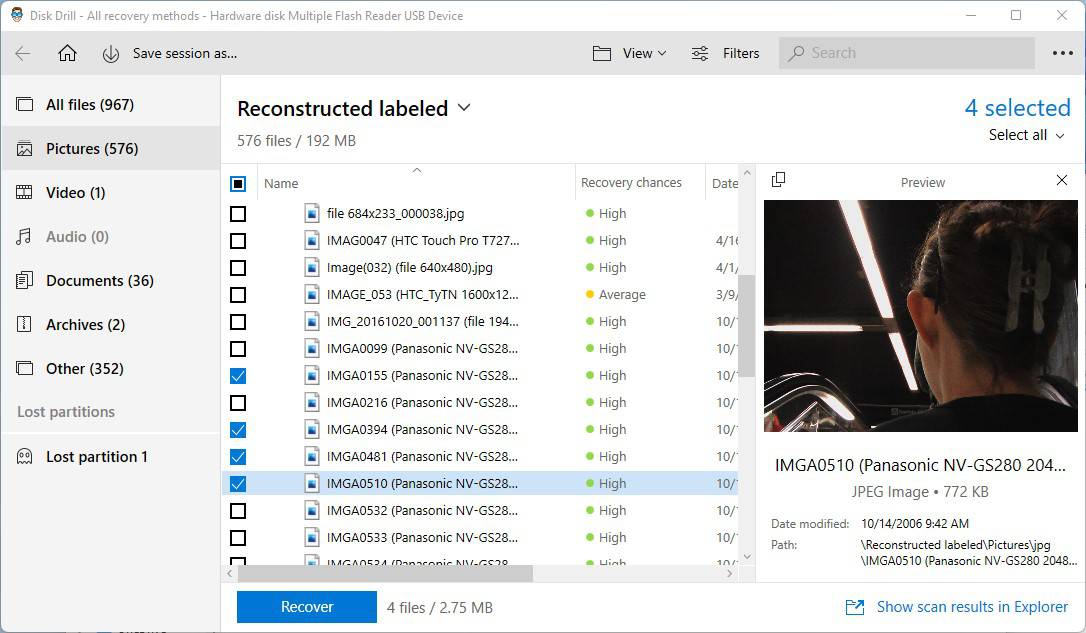
- Check file recovery chances. Place a checkmark to the left of all files you need to recover.
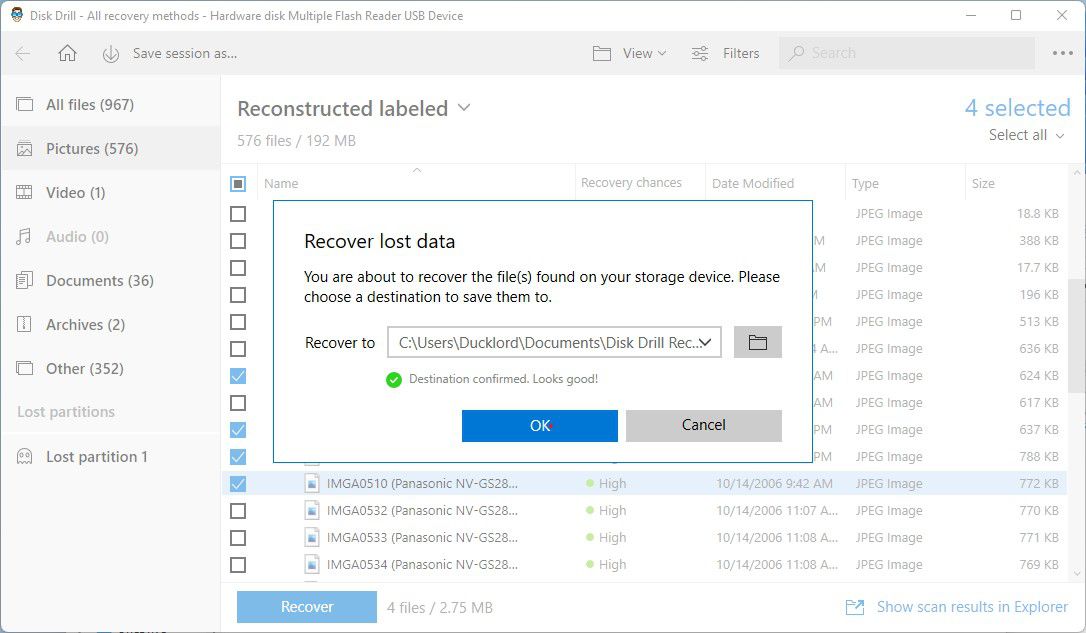
- Press the Recover button, and choose where you’d like Disk Drill to save the recovered files.
With Disk Drill, recovering the content of a formatted SD card couldn’t be simpler. Best of all, you can download Disk Drill for free from the official website.
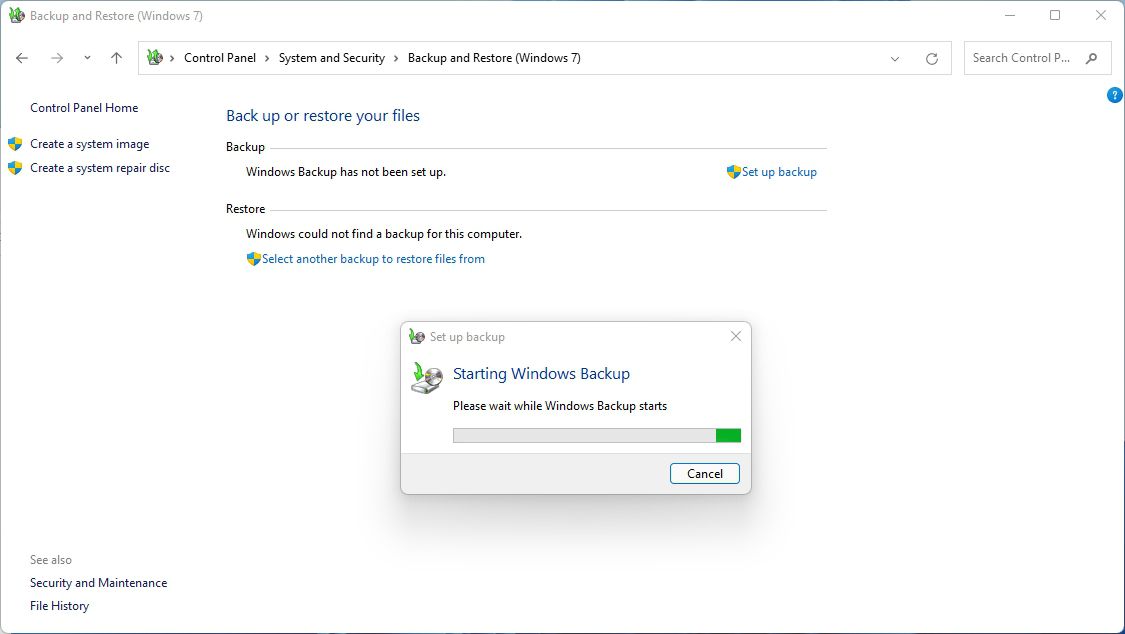
Method 2: Restore the Previous Backup
The backup solutions accompanying Windows usually work only for local storage devices. That means they don’t include removable devices like USB flash drives or SD cards. So, theoretically, they can’t help if you want to get data back from a formatted SD card. Still, if you had also stored the files you want to get back on such a local device, maybe you can salvage them from one of those backups.
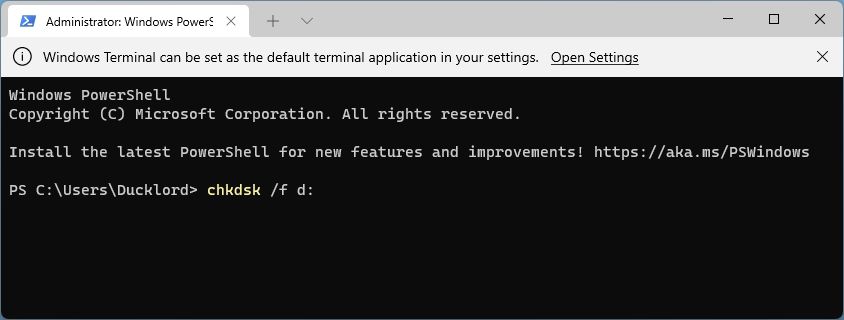
Method 3: Use CHKDSK in a Command Shell
To check and fix any errors on a storage device with CHKDSK, press Windows Key + X and run either the Command Prompt or PowerShell. There, type the following to fix your SD card’s corrupted file system:
chkdsk /f LETTER_OF_DEVICE:
The switch /f sets CHKDSK not only to find and report errors on your storage device but also to attempt to fix them. For such problems, you’d have to use the /r switch instead, as follows:
chkdsk /r LETTER_OF_DEVICE:
❗ You shouldn’t try to fix bad sectors on a storage device before getting your files out of it. Tools like CHKDSK don’t fix problematic sectors. Instead, they mark them as “bad” to avoid their use – and, eventually, their failure and data loss – in the future. However, that means that their current contents – parts of your files – will be lost.
Thus, you should always use a tool like Disk Drill to fish your precious files out of a failing storage device like an SD card. Only after they’re safe should you unleash CHKDSK or any similar solution to try to “fix” the storage device to keep using it.
Recovering Data from Formatted SD Cards on Mac
Saving your files from a formatted SD card isn’t possible only on Windows PCs. If you’re on a Mac, you have a similar arsenal of options you can try out.
Method 1: Get Back Your Lost Data from a Formatted SD Card with Disk Drill
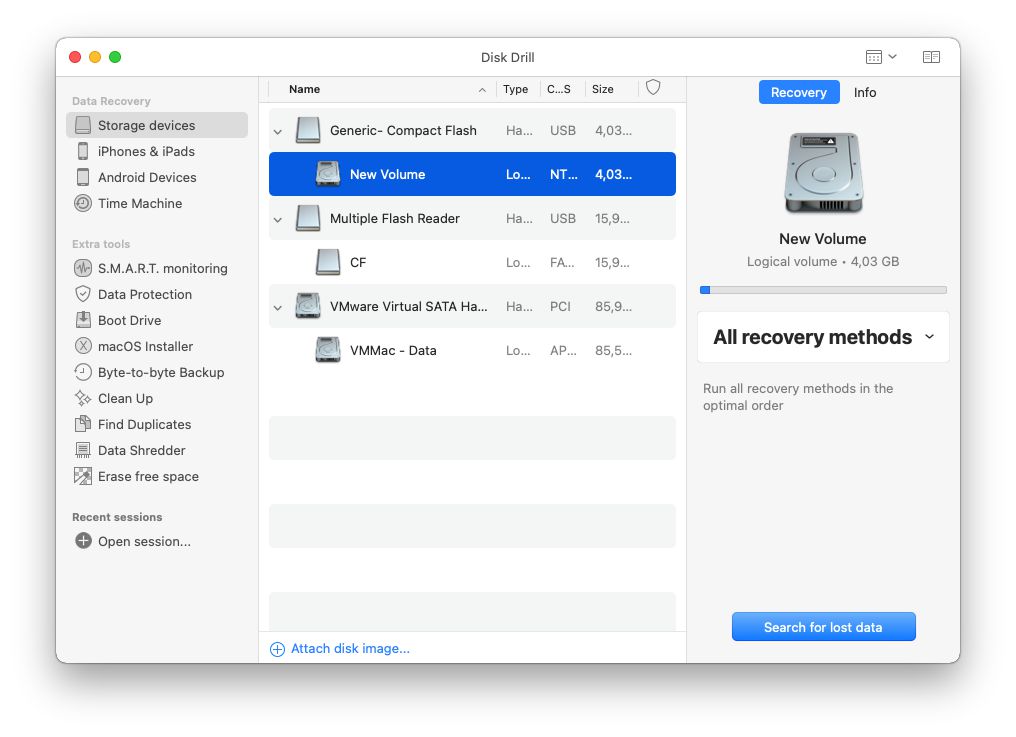
Disk Drill is one of the best solutions for getting your files back from a formatted SD card on a Mac. Start by downloading it from the official site and installing it like any other app. Then, run it.
- Choose your SD card from Disk Drill’s main device list. Then, click on Search for lost data on the bottom right of its window.
- Click on Review found items on the bottom right to check what Disk Drill has already found. However, by allowing Disk Drill enough time to complete its scan, you’re maximizing the chances to locate as many files as possible.
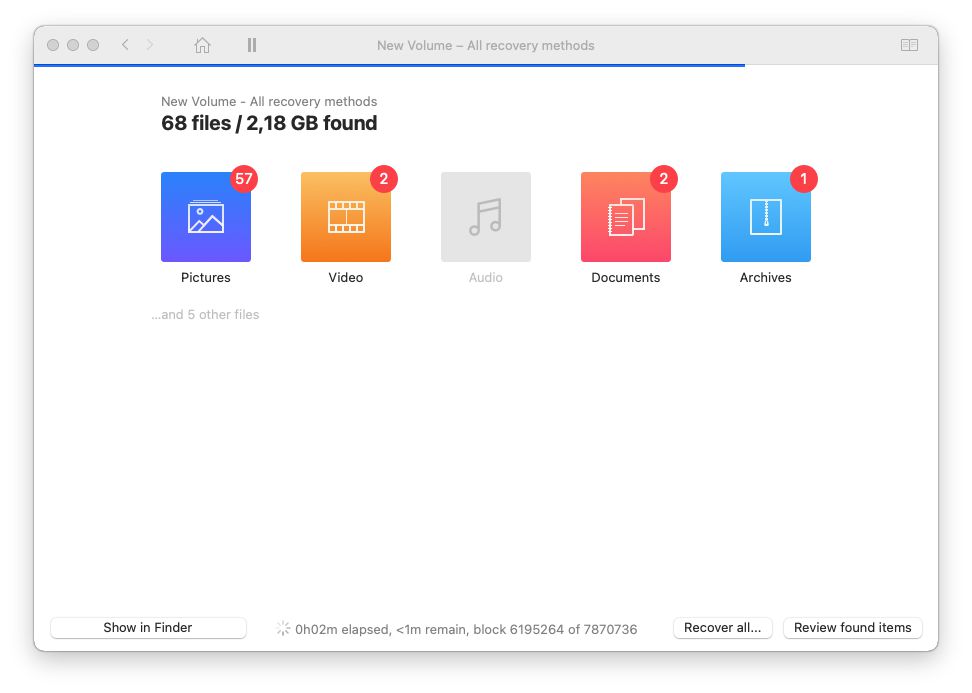
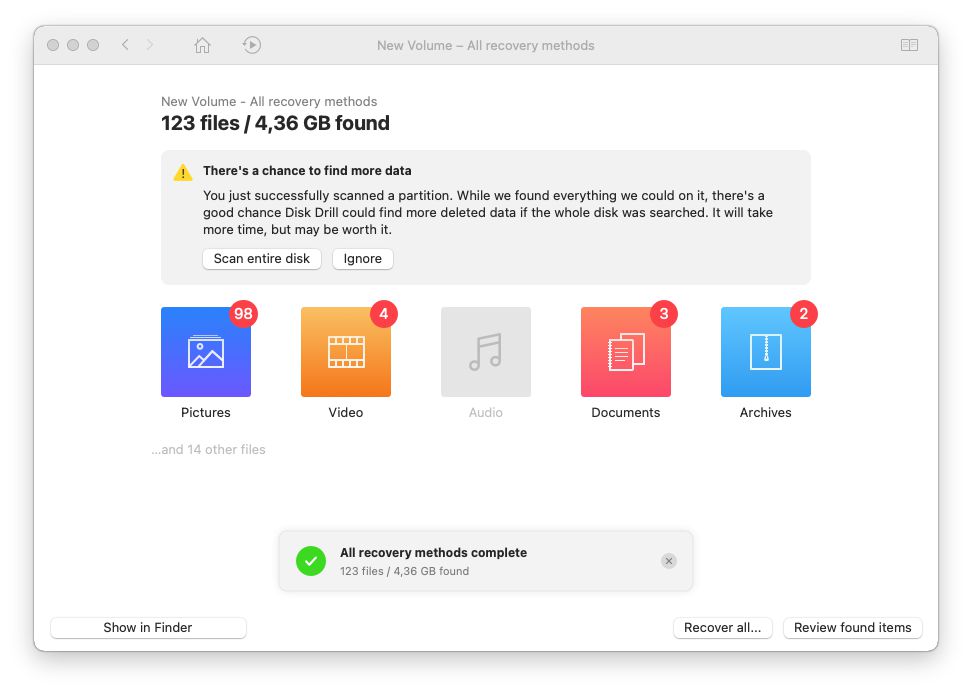
- After a relatively quick initial scan, Disk Drill might ask you if you want to Scan (the) entire disk. This more detailed scan needs more time but usually also reaps better rewards. When all scans are complete, you can click on Recover all to get back everything, or Review found items to choose which files to recover.
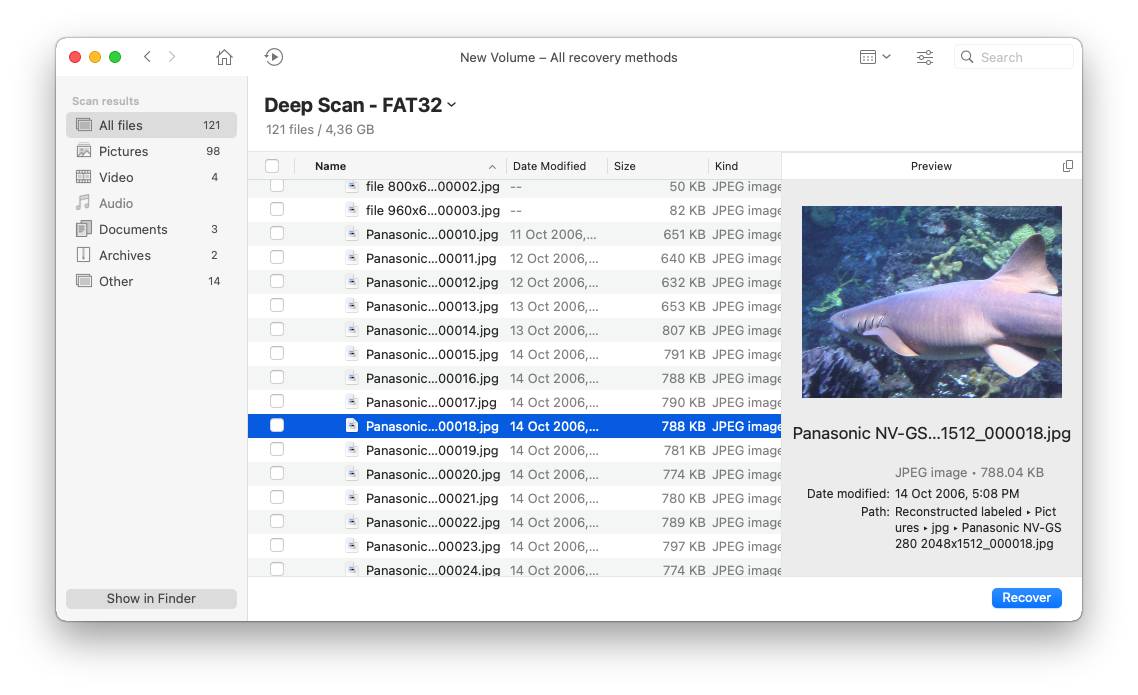
- When manually choosing which files to get back, Disk Drill helpfully groups them by their type. By default, it will list All files, but you can narrow down the list from the group list on the left. You can click on any file to get more information about it. Disk Drill will also show a preview for popular file formats like text documents and images.
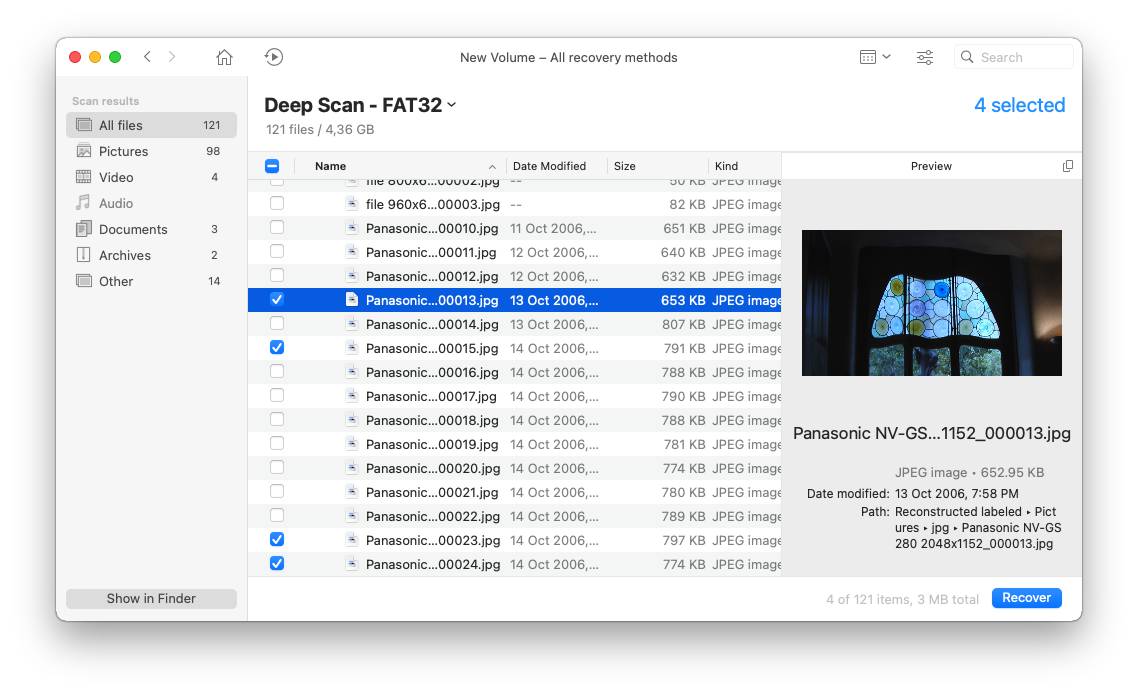
- When you locate the files you want to get back, place a checkmark on their left to mark them for recovery. Then, click on Recover on the bottom right of Disk Drill’s window.
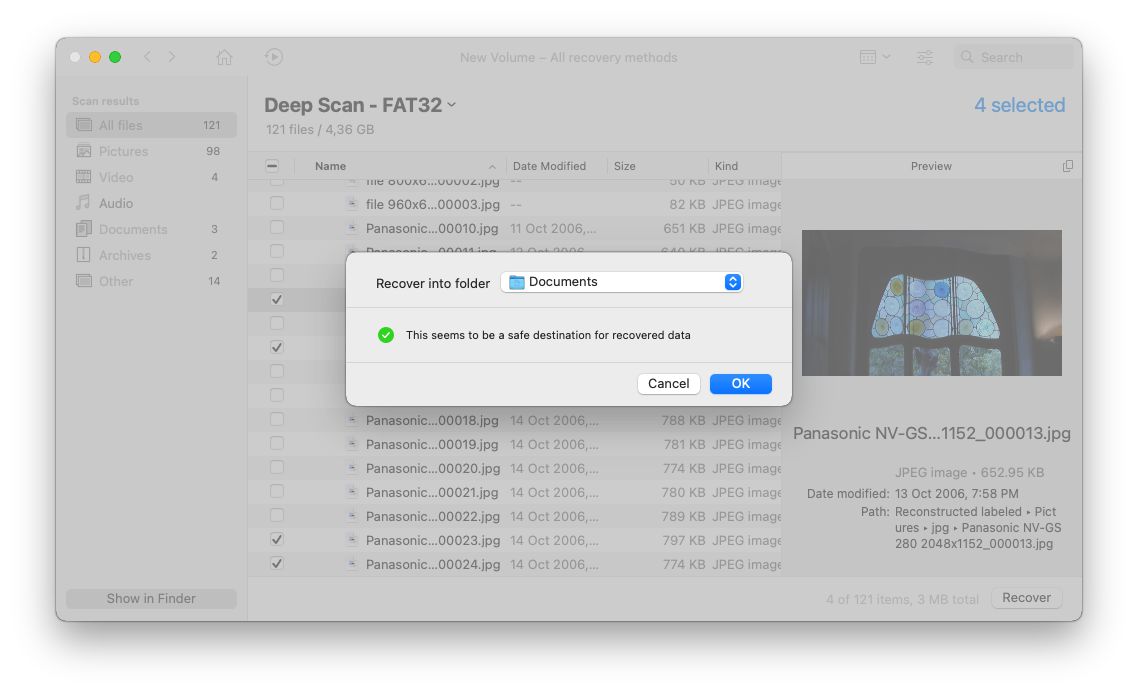
- Disk Drill will ask you to choose the destination for your soon-to-be-recovered files. Follow along, and soon you’ll find them there.


Method 2: Using Terminal to Recover Lost Files from a Formatted SD Card
If you’d prefer a more hands-on way to get back your files from your formatted SD card on a Mac, you can use Photorec in the Terminal.
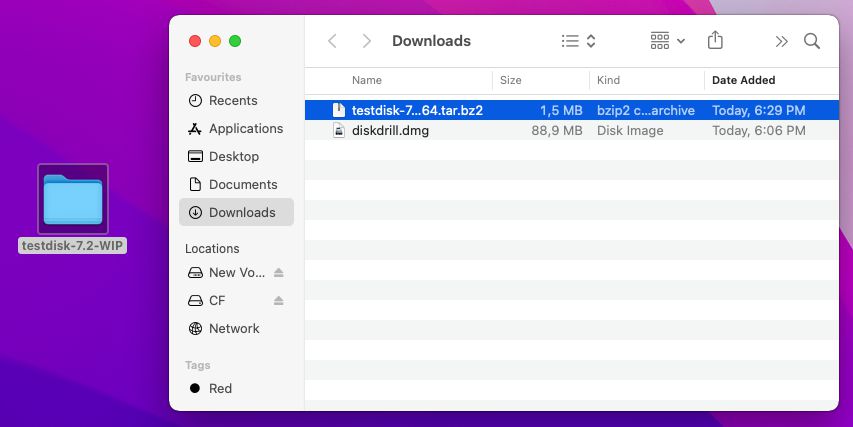
- Start by downloading PhotoRec from its official site. Then, unpack the downloaded archive – we extracted it on our desktop.
- Fire up the Terminal app. Use the
CD(Change Directory) command to move to the folder where you extracted TestDisk. Then, usesudo ./photorecto run Photorec.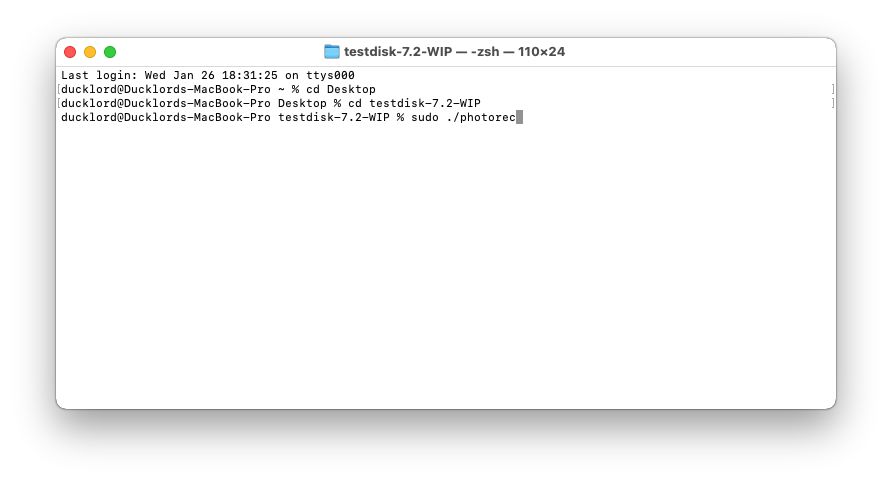
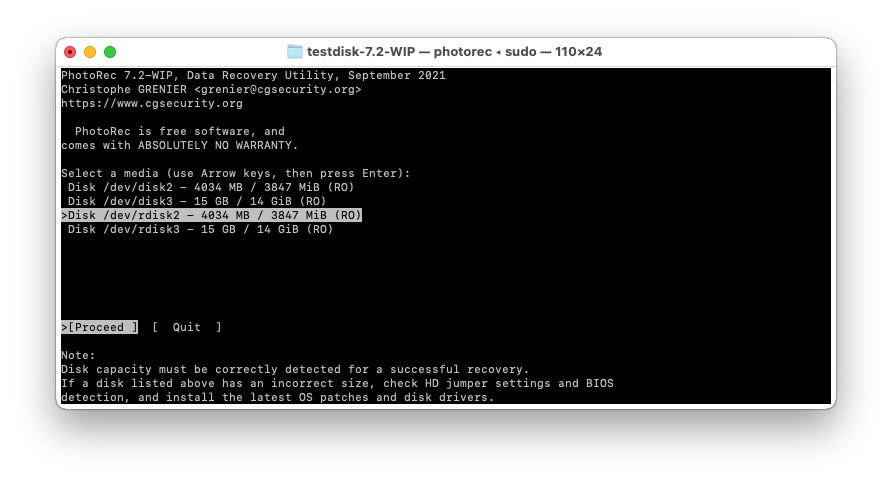
- Choose your SD card from Photorec’s list of media, using the cursor keys to highlight it. Then, with Proceed selected, press Enter on the keyboard.
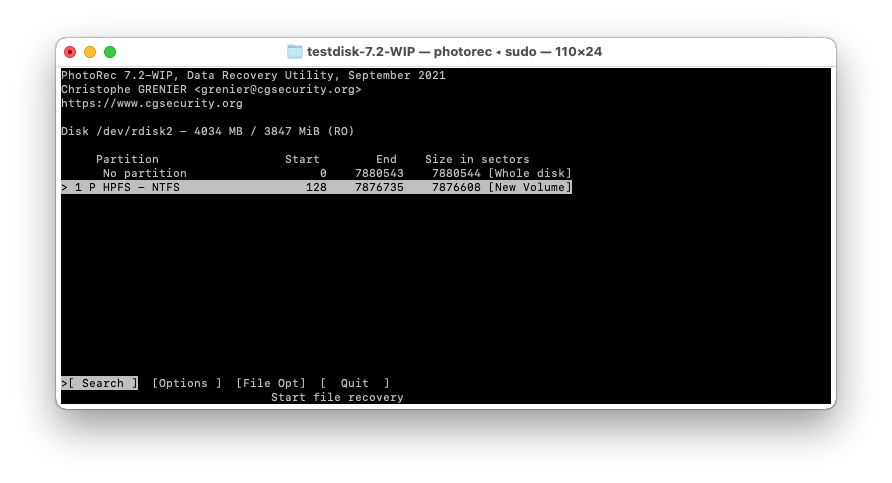
- If Photorec detected an existing partition, choose it and press Enter with Search highlighted to analyze it for lost data. Alternatively, you can select No partition to have Photorec scan the whole device.
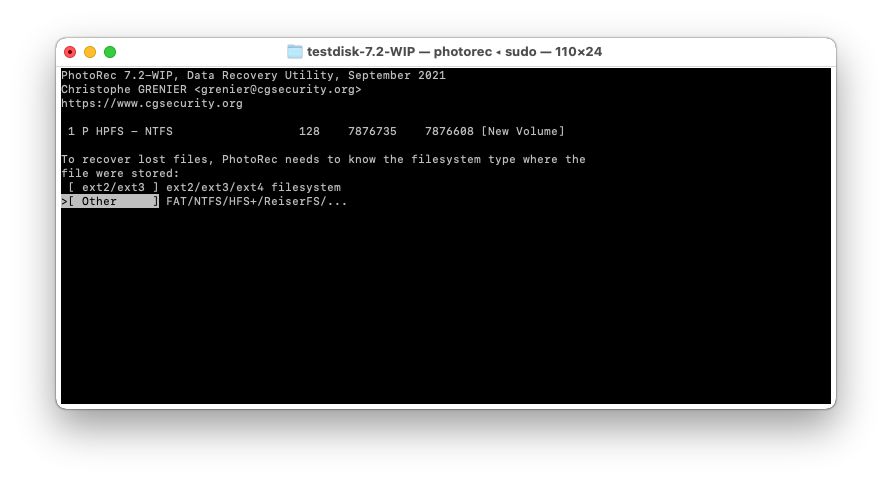
- Photorec will ask for the device’s file system. In most cases, you’ll probably want to choose Other.
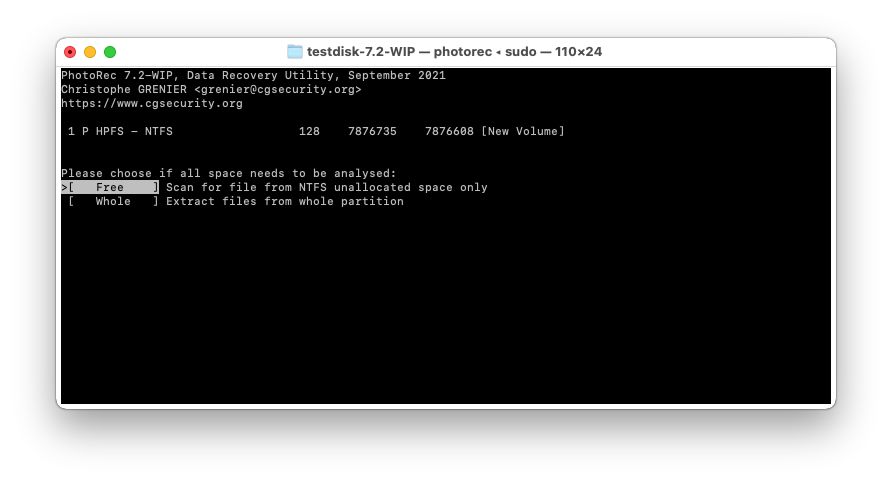
- You can have Photorec perform a partial or complete partition scan. Free is quicker but only scans the unallocated space. Whole is much slower but (usually) leads to extended results.
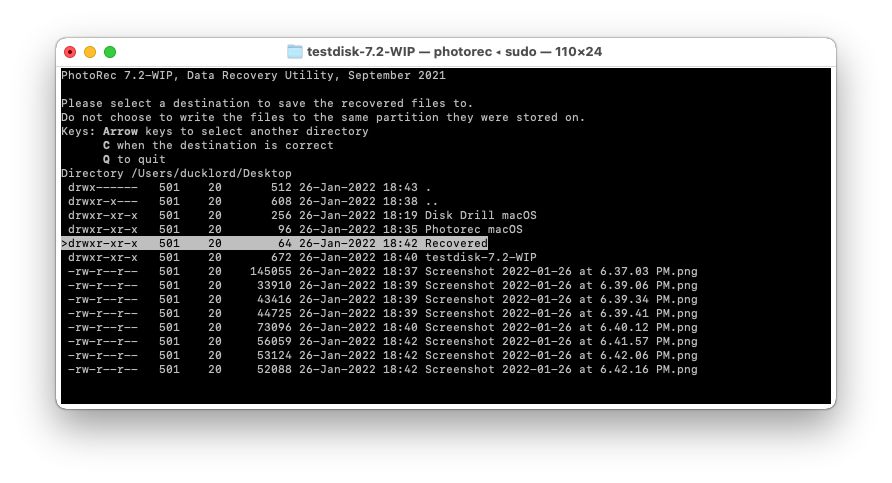
- You’ll also have to choose the destination where Photorec will save any salvaged files. Use the arrow keys and Enter to navigate the file and folder list. Press C on the keyboard when you’re inside the desired destination folder.
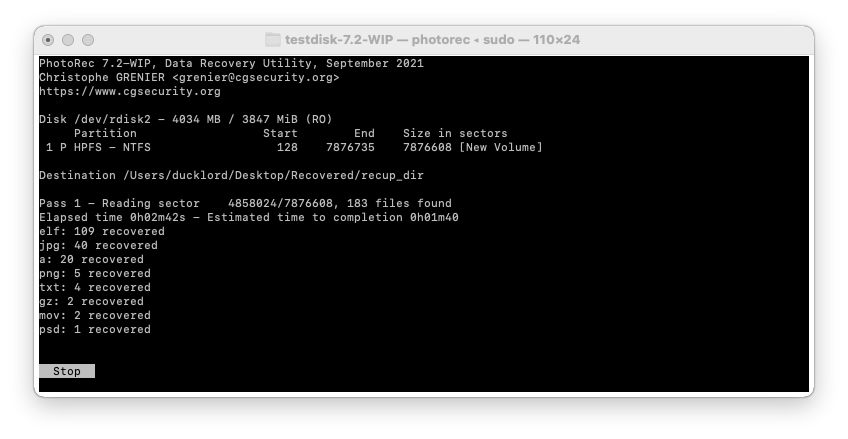
- Give Photorec some time to complete its scan. You can choose Stop to interrupt the scan, but the more time you allow it to run, the more files Photorec will find. Ideally, you should let it complete.
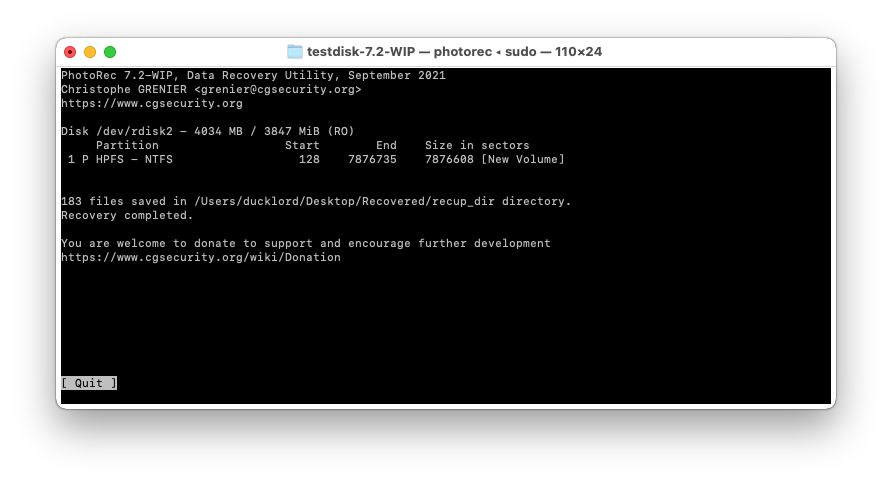
- When the process completes, Photorec will present a summary of the number of files and destination folder. Press Enter on the single preselected Quit option to exit the app. You’ll find all files Photorec recovered in the destination folder you selected.
How to Prevent an SD Card from Becoming Formatted
Having an SD card appear as formatted means you have to recover your lost files, then check it for errors, then format it again to keep using it. It’s time-consuming and annoying. Thus, it’s better to minimize the chances of the problem appearing in the first place.
- ❌ Never abruptly pull out your SD card from any device. Instead, select any available option to detach any removable media safely. Alternatively, you can turn the device off.
- 🔋 Ensure the device where you’re using your SD card, like your camera, is fully charged.
- ⚡ Don’t keep using it until its battery’s power depletes.
- 💾 Don’t accept to format your SD card when a device prompts you to do so. Especially if your SD card works fine on another device, like your PC. If you choose to format your SD card, first ensure you’ve backed up all its contents elsewhere.
- 👨⚕️ When on your PC, use antivirus and firewall apps to keep malicious software and users at bay. Never run untrusted apps from unknown sources, which could end up corrupting your storage devices.
- 🔥 Except for the occasional breeze, the elements aren’t friendly to your SD card. Avoid exposing it to heat, dust, or water.
- 📦 Use carrying cases and never throw your SD card in your pocket among keys, coins, and other “stuff” that could get it scratched, chipped, or bent.
- 🗑 If there’s visible wear, your SD card’s many years old, or it has appeared as formatted or RAW again in the past, it’s time to replace it.
Conclusion
As we saw, even if your SD card appears as formatted, there’s hope you can save your files from it. Even better, you might be able to “fix it” and keep using your SD card like before.
Still, you should be vigilant, especially if the same SD card has failed again in the past. Don’t gamble with your precious files. At the slightest hint of imminent failure, back them up and order a new SD card as soon as possible.
Thanks to nifty tools like Disk Drill, recovery might always be an option and feel like a piece of cake. However, avoiding it altogether is always the wiser course of action.
FAQ
If you’re dealing with a micro SD card that refuses to format, here are some solutions that might help:
- Use a different computer to format the micro SD card.
- Assign a different drive letter to the micro SD card.
- Format the micro SD card using a third-party partition manager.
Still no luck? Then the micro SD card might be damaged or severely corrupted.
Is your operating system telling you that your SD card needs to be formatted? In that case, it’s very likely that the SD card has become corrupted. If you have important data on it, DON’T format it. Instead, use data recovery software to retrieve your data and then fix the formatting issue.
Yes, when you format an SD card, you delete all files stored on it, including your photos. That said, the deleted photos will physically remain on the SD card until they are overwritten by new data, giving you a chance to recover them using special SD card recovery software.
Yes, there are data recovery apps for Android that allow you to recover files from a formatted SD card without a computer. One such app is called Disk Digger, and you can find it on Google Play Store.